Ventoy Multi OS Boot
Overview
This wiki covers how to create a multi-boot USB drive using Ventoy. Ventoy is an open-source tool that allows you to create a bootable USB drive for ISO files. It supports multiple operating systems and can be used to boot various Linux distributions, Windows, and other operating systems.
Download
As with most things I prefer the CLI over the GUI, so although there are methods to install via the GUI, this guide will cover the CLI method.
Navigate to the Ventoy Download Page and grab the linux.tar.gz file. The link will likely redirect you to source forge, select the applicable file again to download it.

Once downloaded, extract the file.
tar -xvf <path-to-file> -C ~/
This will extract the file to the ~/ directory. Now switch to the ventoy directory.
cd ~/ventoy-1.1.05
Update the directory name to match the version you downloaded.
Identify USB Drive
Identify the USB device you want to use for Ventoy. You can use the lsblk command to list all block devices and find your USB drive.
lsblk
This will show you a list of all block devices connected to your system. Look for the device that corresponds to your USB drive (e.g., /dev/sdb). In this example we will use /dev/sda.
Install Ventoy
Now run the .sh script to install Ventoy.
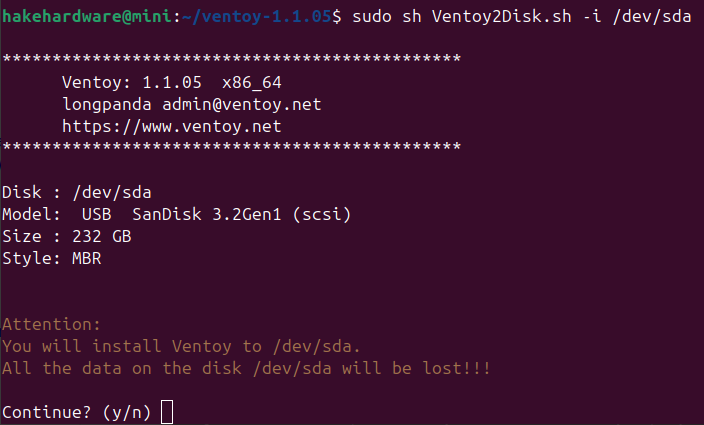
sudo sh Ventoy2Disk.sh -i /dev/sda
Additional flags can be found in the Ventoy Documentation, such as enabling secure boot with -s.
The script will prompt you to confirm the installation. Press y and hit Enter to proceed.

Double check!

The USB drive will be prepared and Ventoy will be installed. After the installation, the USB will have two partitions (using /dev/sda as an example):
- sda1: This is the partition where you will copy your ISO files.
- sda2: Reserved for Ventoy
Copy ISO files
For Ventoy to work, you need to copy the ISO files of the operating systems you want to boot into the first partition of the USB drive. First, mount the first partition
Create a mountpoint:
sudo mkdir /mnt/usb
Then mount the partition to the mountpoint:
sudo mount /dev/sdX1 /mnt/usb
Make sure to update /dev/sdX1 with the correct partition name. You can use lsblk again to confirm the partition name.Then copy the ISO files to the mounted partition.
sudo cp <path-to-iso> /mnt/usb
You can copy multiple ISO files to the USB drive. Ventoy will automatically detect them when you boot from the USB drive. Once you have copied the ISO files, unmount the partition:
sudo umount /mnt/usb
Eject the USB drive:
sudo eject /dev/sdX
Make sure to replace /dev/sdX with the correct device name of your USB drive.
Boot from USB
Now you can boot from the USB drive. Restart your computer and enter the BIOS/UEFI settings to change the boot order. Select the USB drive as the first boot device. Alternately you can often access the boot menu by pressing a key during startup (usually F12, Esc, or F2 depending on your system).
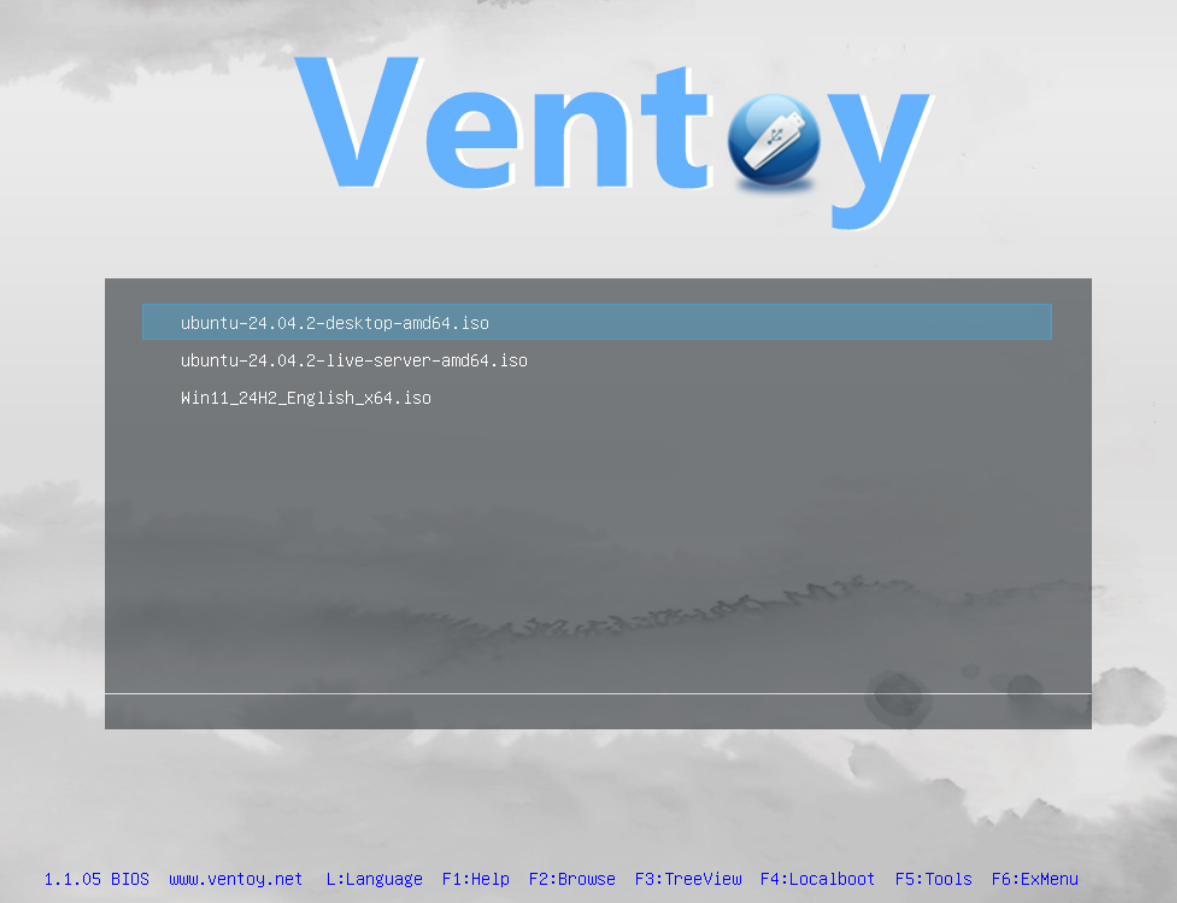
When you boot from the USB drive, you will see the Ventoy menu with a list of ISO files you copied. Select the desired ISO file and press Enter to boot into it.

Updating Ventoy
If you ever need to update Ventoy to a new version, you can do so by downloading the latest version from the Ventoy Download Page and running the installation script again. The existing ISO files on the USB drive will not be affected.
Conclusion
You have successfully created a multi-boot USB drive using Ventoy. You can now use this USB drive to boot into multiple operating systems without the need to reformat or create separate partitions for each ISO file. Ventoy makes it easy to manage and boot from multiple ISO files, making it a great tool for system administrators, developers, and anyone who needs to work with multiple operating systems.