Install FE Proxmox eMMC
YouTube video coming soon!
Overview
This guide will walk you through the process of installing FriendlyElec's version of Proxmox VE 8.2.7 onto the eMMC of a CM3588 using a MicroSD card. FriendlyElec maintains a few custom eflasher images for the CM3588, which are used to flash the eMMC storage. These images are handy as once the MicroSD card has been prepared and installed into the CM3588, the eMMC will be automatically flashed when the system is powered on.
Prerequisites
- A CM3588 (of course)
- A MicroSD card (at least 16GB recommended)
- A MicroSD card reader (if your PC does not have a slot)
- The OS image you wish to install (in this case, FriendlyElec's Proxmox VE 8.2.7 eflasher image)
Download the Proxmox Image
Navigate to the FriendlyElec wiki and click the download link.

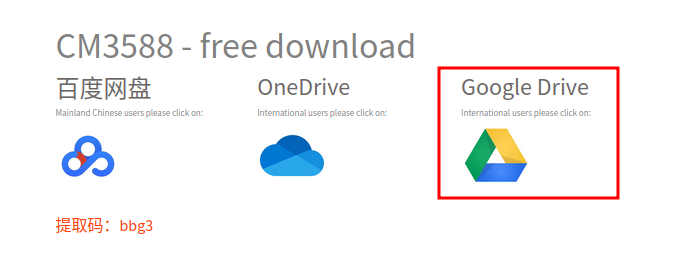
Then select the Google Drive

Select 01_Official images
Proxmox will be installed to the eMMC of the CM3588, so select 02_SD-to-eMMC images.
There are a lot of images listed here, however this guide is specifically for rk3588-eflasher-proxmox-6.1-arm64-20250123.img.gz.

Flash the Image
Do not install the Micro SD card into the CM3588 after flashing it as with Proxmox there is one additional step we must do.
Now that the image has been downloaded, follow one of the below guides depending on your operating system to flash the image to the MicroSD card.
- Ubuntu: Prepare MicroSD Card on Ubuntu
- Windows: Prepare MicroSD Card on Windows
By default the image will use 192.168.1.200, which may conflict with other devices on your network. To avoid this, we will change the IP address to something else. The IP can be preset by editing the config file.
Ubuntu/Linux
If you are using Ubuntu or Linux, you can change the IP address by mounting the /dev/sda1 partition (it may already be mounted, you can check with lsblk) and editing the config file. Make sure to replace /dev/sdX1 with the actual device name of your MicroSD card partition (it may be /dev/sda1, /dev/sdb1, etc. depending on your system).
sudo mount /dev/sdX1 /mnt
Then open up the info.conf file in a text editor of your choice. For example, using nano:
sudo nano /mnt/proxmox-arm64/info.conf
Then append the following to the end of the file
bootargs-ext=proxmox_ip=<your_desired_ip>
If using nano, press CTRL + X to exit, then Y to save the changes, and Enter to confirm the filename. Unmount the drive and eject it.
sudo umount /dev/sdx1
sudo eject /dev/sdX
Then remove the MicroSD card and insert it into the CM3588.
Windows
TODO
Flash the eMMC
If you have a monitor hooked up to the CM3588, note that 1 of the HDMI ports is an input, and 2 are outputs. To be sure you are using an output, use the middle port. Otherwise you may get a black screen on boot.
Flashing the eMMC on the CM3588 happens automatically when the system is powered on. With the system powered off, simply insert the MicroSD card into the CM3588 and power it on. The system will automatically detect the MicroSD card and begin flashing the eMMC.
Once complete, the system will prompt you to shut it down. I typically do not even attach a keyboard and just hit the power button to turn it off as I manage nearly everything over SSH after the installation.
After the system is powered off, remove the MicroSD card before you power it back on. The system should now boot from the eMMC. If you do not remove the Micro SD card, the system will boot and flash the eMMC storage again.
Accessing Proxmox
Once the eMMC has been flashed and the CM3588 is booted up, the Proxmox Web interface should be accessible at the IP specified in the config file. Open a browser and enter
https://<your_specified_ip>:8006
The default login credentials for Proxmox are root for the username and fa for the password.
Change the root Password
For security reasons, it is highly recommended to change the default root password after your first login. Select prox4nanopi from the left hand side
Then select the Shell option from the top right corner of the Proxmox interface. This will open a terminal window in your browser.
Run the following command:
passwd
Post Install Script
I recommend running the Proxmox VE Helper-Script Proxmox VE Post Install. This script is run in the Shell and the command can be found on the Proxmox VE Helper-Scripts website.
Conclusion
Congratulations! You have successfully installed FriendlyElec's version of Proxmox VE 8.2.7 onto the eMMC of your CM3588. You can now begin configuring your Proxmox environment and deploying virtual machines or containers as needed. I recommend reviewing the FriendlyElec wiki for Proxmox to learn more about the specifics of using Proxmox on the CM3588, as with the ARM CPU things are a bit different.