Docker VM
Overview
This wiki covers how to set up a dedicated VM for Docker. In this guide a VM will be created and Docker will be installed on it. Portainer Server will also be installed as a way to manage the Docker containers, however based on your preference a different management tool can be used.
In this use case, all docker apps will be installed under a single VM, but you can create a new VM for each application if you wish. There are benefits to both approaches, but for simplicity, this guide will focus on a single VM for all Docker containers and this is the method I typically use.
I also use Ubuntu Server as my OS of choice, but you can use any OS that is supported by Docker. This guide will focus on using Ubuntu Server 24.04 LTS.
Download Ubuntu Server 24.04 LTS
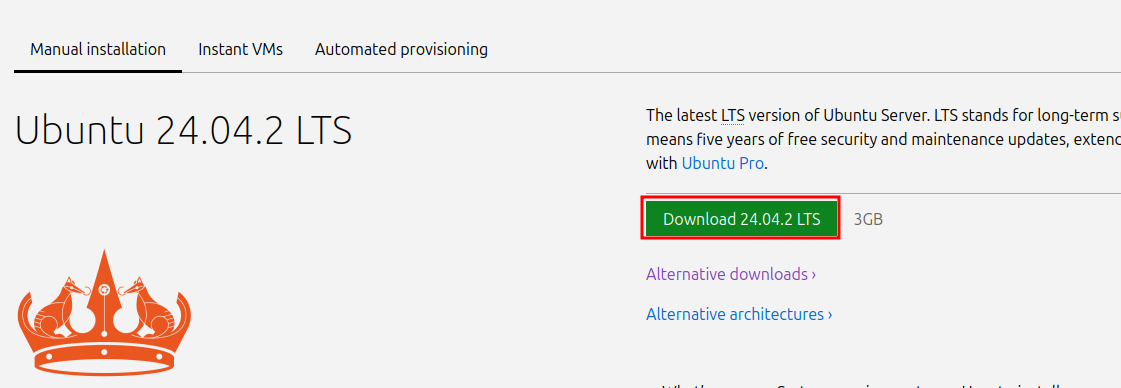
The first step is to navigate to Download Ubuntu Server 24.04 LTS and copy the download link for the Ubuntu Server ISO. Once on the Ubuntu Server download page, click on the button labeled Download 24.04.2 LTS (this may change based on the latest version available), then cancel the auto-download.
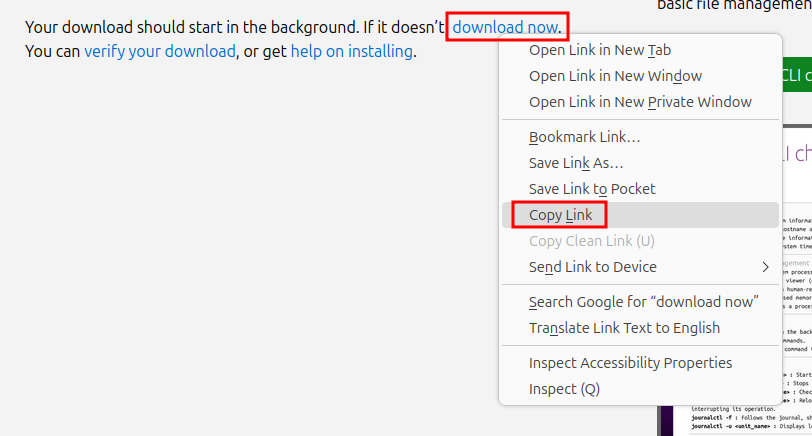
Instead, right click on the download now link and then copy the link address.
Open up Proxmox and navigate to local disk in the Server View. Then select ISO Images, and then Download from URL.

Paste the URL into the URL: input and click Query URL. You should see the File name populate automatically to the .iso file. Then click Download.

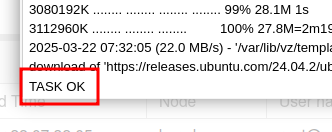
The download will begin, and once it is complete you will see TASK OK.
Create the Docker VM
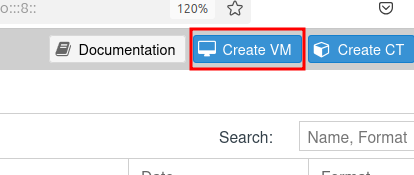
Close out of the download window, then click Create VM at the top right of the Proxmox web interface.
Set the VM ID and Name to your liking. Then click Next.

In the ISO image drowndown, select the Ubuntu Server ISO that was just downloaded. Then click Next.

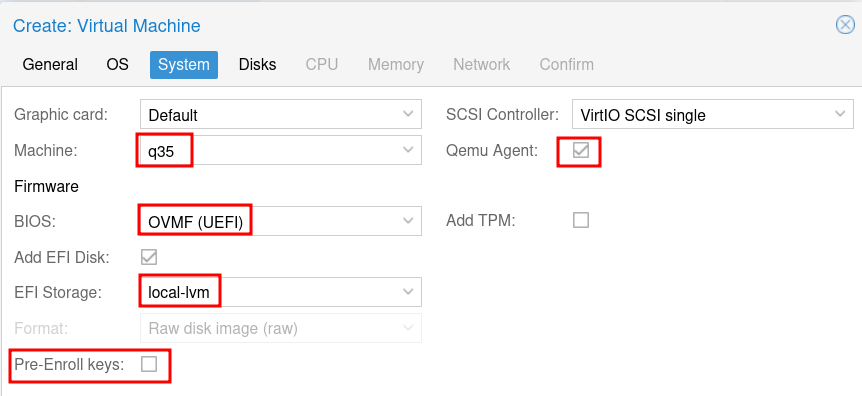
For Machine, select q35 and for BIOS select OVMF (UEFI). For EFI Storage choose your local-lvm and unselect Pre-Enroll keys. Then enable the Qemu Agent. Then click Next.
For the Disks, select the storage disk if not using the local-lvm. For size, 32GB is sufficient for the OS and Docker installation plus a few Docker apps depending on the type. If adding Docker apps which require more space (like Plex or Jellyfin), additional disks can be passed to the VM later and mounted as needed (like from a NAS) or directly passed through to the VM.
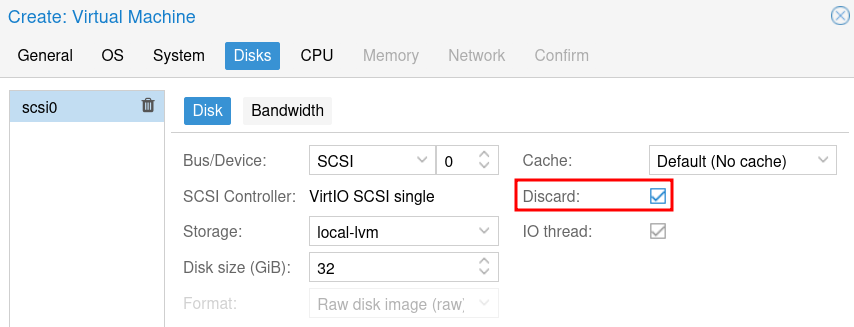
Leave the Cache as the default, enable Discard if using an SSD (recommended) and leave IO Thread enabled. Then click Next.
For CPU, select the number of cores you want to allocate to the VM. For most use cases with a few Docker containers, 2-4 cores is sufficient, but it will depend on your use-case as some Docker containers will use a lot of resources. Ensure host is selected for the Type. Then click Next.

For Memory, allocate the amount of RAM you want to dedicate to the VM. For most use cases, 2-4GB is sufficient, but again, it will depend on your use-case. It can always be increased later if needed. Then click Next.

For most the default network settings will be fine. Click Next to continue.

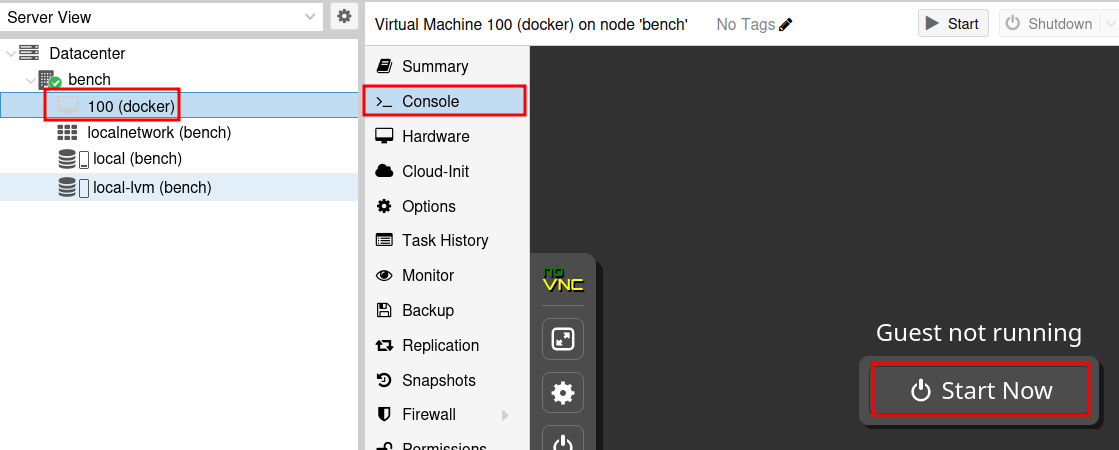
Finally, click Finish and wait for the VM to be created. Once created, click on the VM and go to the Console, then click Start Now.
Install Ubuntu Server
The VM will boot up and you will see the Ubuntu Server installation screen. Select Try or Install Ubuntu Server and wait for the system to boot. For the installation, I will not capture all screens as some are pretty basic, if you run into trouble check the video at the top of the wiki.
- The first screen should be selecting the language, select your preferred language and press
Enterto move to the next page. - If you need to select a different keyboard layout, you can do so on the next screen. Otherwise, select
Doneand pressEnter. - On the next page, ensure
Ubuntu Serveris selected and pressEnterto continue. - On the network configuration screen you should see an IP populate, hit
Enterto continue. - For the Proxy configuration, most users can leave this blank and press
Enterto continue. - Wait for the mirror location test to finish. Once it says
Reading package lists...pressEnterto continue. - On the Guided storage configuration screen, ensure
Use an entire diskis selected, and ensureset up this disk as LVMis selected. Use the arrow keys orTabto selectDoneand pressEnterto continue.
On the Storage configuration screen, by default the entire disk is not used. Navigate up to the ubuntu-lv entry under USED DEVICES.

Then hit Enter and then select Edit and hit Enter again.
This will open up the edit page for the volume. For size, remove the existing value and enter the size listed as max to the left. Tab down to Save and press Enter to save the changes.
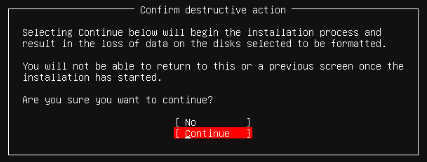
Now tab back down to Done and press Enter. When prompted to confirm destructive action, select Continue and press Enter.
On the Profile Configuration screen, enter a name, server name, username, and set a password. I usually use docker as the server name, and hakehardware as my name and username, but you can use whatever you like.
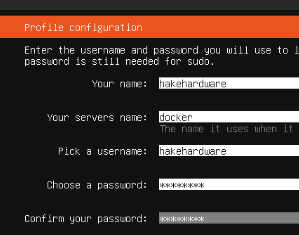
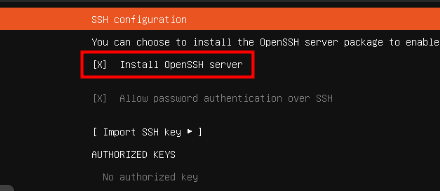
Tab down to Done and press Enter. Press Enter again to continue without upgrading to Ubuntu Pro. On the SSH configuration screen, press space bar to select Install OpenSSH server and then tab down to Done and press Enter.
On the Featured Server Snaps screen, select Done and press Enter. The installation process will begin. Once finished, select Reboot Now and press Enter. When prompted to remove the installation media, hit Enter to continue.
Remove Installation Media
With the Docker VM selected, navigate to the Hardware tab. Select the CD/DVD Drive and click on Remove. This will remove the installation media from the VM.

The media will not be removed from the VM until the VM is powered off. Until then it will just have a strike through it.
![]()
Using SSH
At this point, you can log into the VM via an SSH client if you wish to abandon the console. I perfer to use Terminus as my SSH client as it is much easier to copy and paste commands into it. You can download it here. To log in via SSH, first log into the OS via the Console tab, when logged in the IP address will be displayed on the welcome screen. If you missed it, you can type ip a to display the IP address.

You can SSH into the VM using Termius or just via the CLI by typing the following command:
ssh username@ipaddress
Replace username with the username you created during the installation process and ipaddress with the IP address of the VM.
Prepare the System
There are a few things that should be done to prepare the system for Docker. First, update the system by running the following commands:
sudo apt update && sudo apt upgrade -y
This will update the package lists and install any available updates. Once the updates are installed, reboot the system and log back in via the Console or SSH.
sudo reboot now
Now is a good time to install the Qemu Guest Agent. This will allow Proxmox to better manage the VM. To install the Qemu Guest Agent, run the following command:
sudo apt install qemu-guest-agent -y
This will install the Qemu Guest Agent. Once the installation is complete, start the service by running the following command:
sudo systemctl start qemu-guest-agent
The service will automatically start on boot and allow features like reboot and shutdown to work properly from the Proxmox web interface.
Install Docker
To install Docker, run the following command:
curl -fsSL https://get.docker.com | sh
This will download and install the latest version of Docker. Once the installation is complete, you can verify that Docker is installed by running the following command:
sudo docker --version
I prefer to force using sudo for all docker commands, but if you want to run docker commands without sudo, you can add your user to the docker group by running the following command:
sudo usermod -aG docker $USER
You will need to log out and log back in for the changes to take effect.
Install Portainer
To manage Docker containers, I recommend installing Portainer. To install Portainer, run the following command:
sudo docker volume create portainer_data
This will create a volume for Portainer. Next, run the following command to install Portainer:
sudo docker run -d -p 8000:8000 -p 9443:9443 --name portainer --restart=always -v /var/run/docker.sock:/var/run/docker.sock -v portainer_data:/data portainer/portainer-ce:lts
This will download and run the Portainer container. Once the container is running, you can access the Portainer web interface by navigating to https://<ipaddress>:9443 in your web browser. Replace <ipaddress> with the IP address of your Docker VM.
Make sure to accept the security risk if using a self-signed certificate.

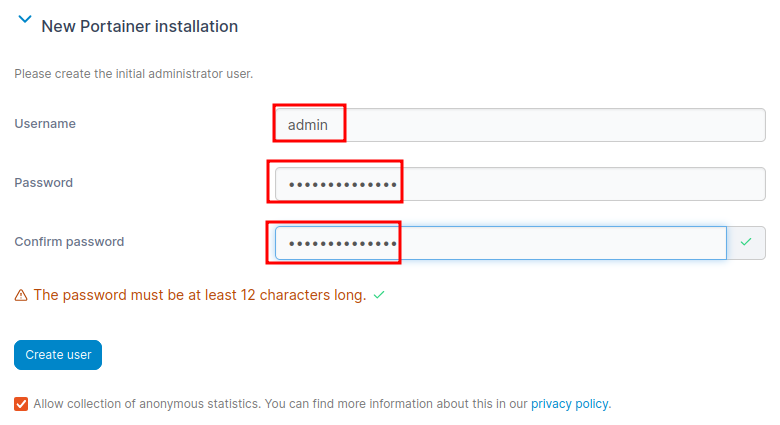
You will be prompted to create an admin user and password. Once logged in, you can start creating and managing your Docker containers.
Final Thoughts
At this point, you now have a dedicated VM for Docker with Portainer installed. You can now start creating and managing your Docker containers. This setup allows for easy management of resources and backups, as well as providing a clean separation of applications. It is up to you whether you want to create a new Docker VM for every application or just one for all your Docker containers. The choice is yours!