Pi-hole [Helper Script]
Overview
This wiki covers how to install Pi-hole on Proxmox using Helper Scripts. Pi-hole is a network-wide ad blocker that acts as a DNS sinkhole, preventing unwanted ads and trackers from reaching your devices. It can also be used with something like NGINX Proxy Manager which acts as a reverse proxy and manages SSL certificates.
Always be cautious when running scripts from the internet. Review the code and understand what it does before executing it on your system. That being said, ProxmoxVE Helper Scripts are widely used and trusted by the community.
Installation
Navigate to ProxmoxVE Helper Scripts Pi-Hole page and copy the script to your clipboard.

Then open up the Proxmox web interface, and click the Shell button on the top right corner.

Paste the script into the shell and hit Enter. This will download and launch the script on your Proxmox server. When prompted, select Yes to proceed with the installation.
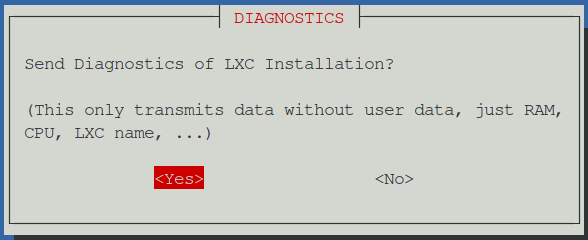
Decide whether you want to send some diagnostic data to the developers of the script. This is optional and can be skipped by selecting No.

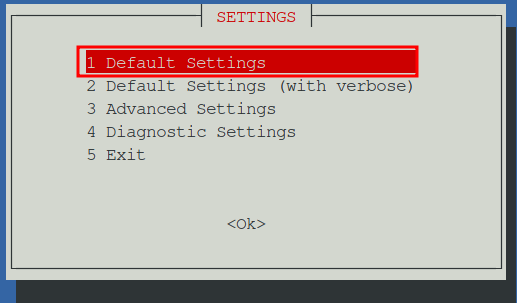
There are a few options to choose from for the installation process. Generally speaking the default settings are fine, however if you prefer to manually set the resources assigned to the container, select the option for Advanced Settings. This guide will use the Default Settings option. Pressing Tab will move the selection to the OK button, then hit Enter to proceed.

The script will begin the container deployment process. This may take a few minutes depending on your server's resources and network speed as various updates and dependencies are automatically applied.
There will be an option to install Unbound, which acts as a DNS resolver and can improve the performance of Pi-hole. If you want to use Unbound, select Yes and hit Enter. Otherwise, select No and hit Enter. Setting up Unbound will not be covered in this guide.
When the contianer is successfully deployed, you will see a URL that you can use to access the Pi-hole web interface.

At this point Pi-hole is installed and running, but until it is set as the DNS server for your network, it will not block any ads. To do this, you can either set the Pi-hole container as the DNS server for your router or manually set it on each device.
Setting Pi-hole as the DNS Server
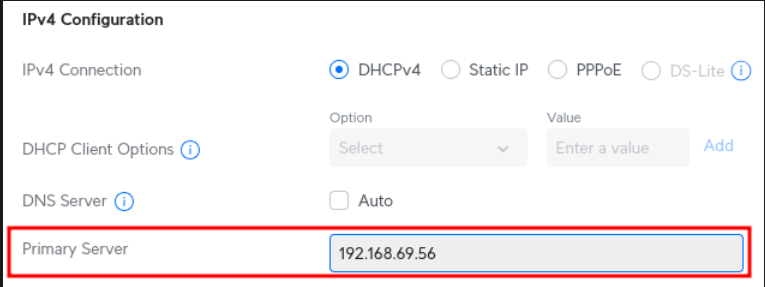
I am using a Unifi Dream Machine (UDM) as my router, but the process is similar for most routers. Locate the location where you can set your DNS servers. This is usually found in the DHCP settings or LAN settings of your router. Update the DNS server to the IP address of your Pi-hole container. In my case, it is 192.168.69.56. I choose to not set a secondary DNS as there is a chance that it could bypass the Pi-hole filtering even when using Pi-hole as the primary DNS.

After saving the settings, you may need to restart your router for the changes to take effect. Once the router is back online, you can check if Pi-hole is working by pasting the following URL into your web browser:
http://pi.hole
If everything is set up correctly, you should see the Pi-hole dashboard. Your router is now using Pi-hole as its DNS server, and any devices connected to your network will automatically use Pi-hole for DNS resolution.

Additional Lists
By default Pi-hole comes with a set of blocklists that help filter out ads and trackers. However, you can enhance its capabilities by adding additional blocklists.
To do this, navigate to the Pi-hole web interface and click on Group Management in the left sidebar. Then select Lists. A popular website to find additional lists is Firebog. Here you can find various lists categorized by their purpose, such as ad-blocking, malware protection, and privacy.
It is best to slowly add lists overtime to see how they affect your network. Some lists may block legitimate sites or services, so it is important to monitor the performance of Pi-hole after adding new lists.
Another good resource is wally3k which provides a collection of curated blocklists for various purposes.
Pi-hole Themes
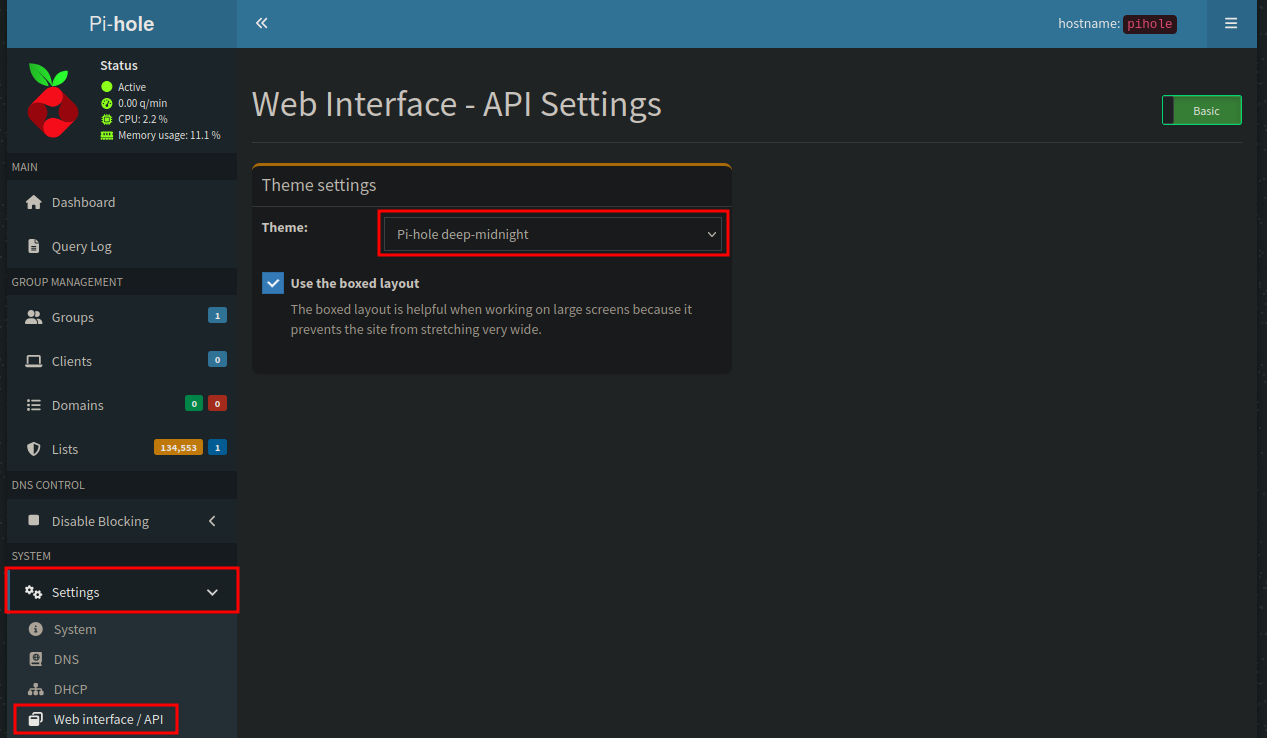
Pi-hole comes with a default theme, but you can customize the appearance of the dashboard by selecting a different theme. To do this, navigate to the Pi-hole web interface and click on Settings in the left sidebar. Then select the Theme tab. Here you can choose from a variety of themes to change the look and
feel of the dashboard.

Conclusion
Congratulations! You have successfully installed Pi-hole on Proxmox using Helper Scripts. Your network is now equipped with a powerful ad-blocking solution that enhances your browsing experience and improves privacy.
With Pi-hole installed, other tools such as NGINX Proxy Manager can be used to manage SSL certificates and reverse proxy requests to other services running on your network.
I also highly recommend running at least 1 Pi-hole replica on your network. You can then use something like Nebula-sync to sync the settings between your primary and replica Pi-hole instances. This way, if one Pi-hole goes down, the other will still be available to handle DNS requests.