Home Assistant OS [Helper Script]
Overview
This guide will walk you through the process of setting up Home Assistant OS with a Helper Script on Proxmox. This is a simple script that will help you set up Home Assistant OS on a Proxmox VM with a few simple commands. It will also help you set up the network and other settings for the VM.
Prerequisites
- Proxmox VE 8.0 or later
- Make sure you have the minimum requirements for Home Assistant OS
Install Home Assistant OS
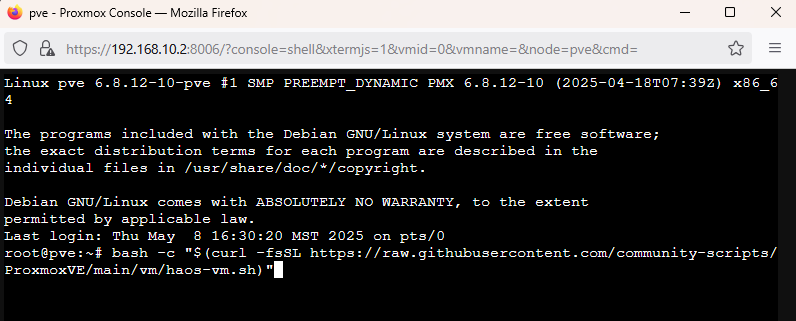
The first step is to navigate to the Home Assistant OS Helper Script and copy the command.

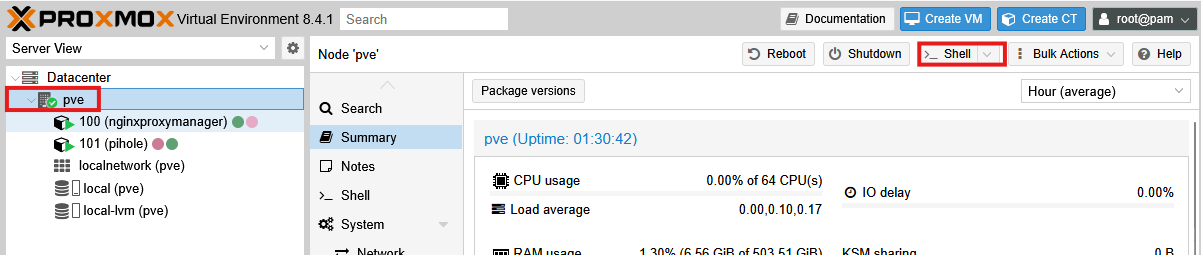
Then, open the shell by ensuring your PVE is selected under the Datacenter and clicking on the Shell button in the top right corner.
Paste the command you copied from the Home Assistant OS Helper Script and hit enter.
Click "Yes" to confirm the installation.

I prefer to use "Advanced" settings, so I will select "Advanced".

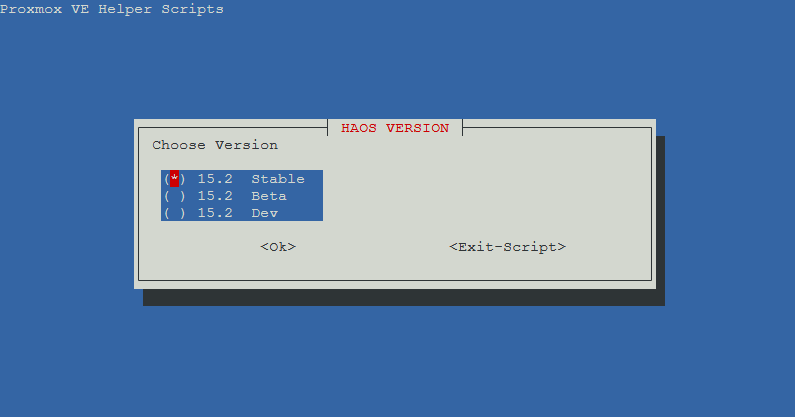
Select the "Stable" version of Home Assistant OS, then click "OK".
I usually leave the Virtual Machine ID to the default, but you can change it if you want.

I recommend selecting "q35" for the machine type unless you have very old hardware.

I leave the default of "Write Through".

Update or leave the hostname as the default.

For CPU Model, I usually select "Host" unless you have very old hardware.

For the resources I use the following: CPU Cores - 2 RAM - 8192MB (8GB)
Ultimately this will depend on your hardware and how many add-ons you plan to run. I recommend at least 4GB of RAM.
Leave the bridge as the default

Leave MAC Address as the default.

Leave VLAN blank unless you are using VLANs.

Leave MTU Size blank

Select "Yes" for "Start VM when completed"

Select "Yes" for "Ready to Create"

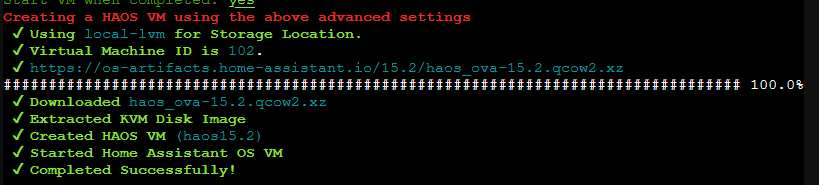
It will now create the VM. This may take a few minutes.

Once the VM is created, you will see a message that says "Completed Successfully".
Access Home Assistant OS
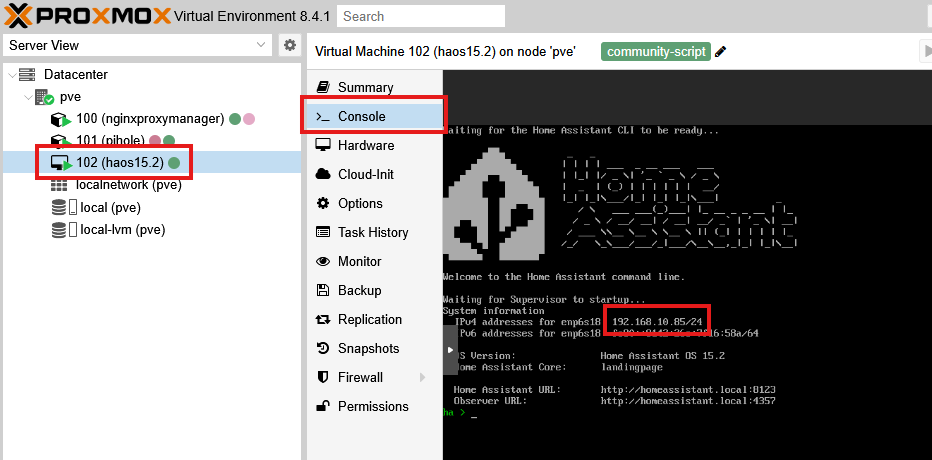
To find the IP address of the VM, click on the VM and then click on the "Console" tab. This will open the console for the VM which should show the IP address of the VM.
You may be able to use the domain to access the VM, but I usually just use the IP address.
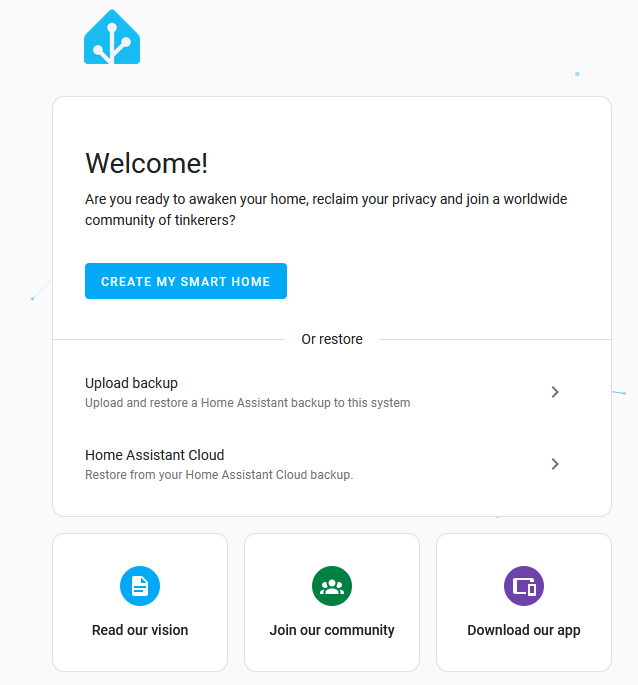
Now you can click "Create My Smart Home" to get started, or restore from a backup.
Next Steps
There is an extra step required when setting up a reverse proxy for Home Assistant OS. Make sure to follow this guide: TODO
I recommend setting up a static IP address for the VM through your router. Once this is done, you can use a reverse proxy like Nginx Proxy Manager to access the VM via a domain. I recommend checking out: