Proxmox Post Install Guide
This guide is currently being created and will be updated soon!
Overview
This guide covers essential post-installation tasks for Proxmox. This is basically the same as the helper script, except each step is done manually. Great for those that do not want to use internet scripts or want to learn how to do it manually.
Prerequisites
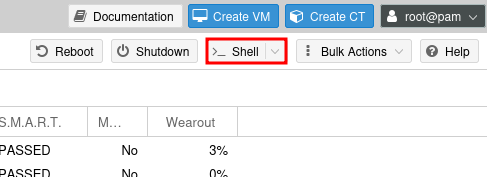
This guide was created using proxmox 8.4.0. It should work for any version of proxmox 8.x. It may work for earlier versions, but it is not guaranteed. You can check by opening a shell
And running the following command:
pveversion
You should see output similar to this:
![]()
Set Correct Debian APT Sources
Proxmox uses a non-default APT source list. This is not the same as the Debian APT sources. Although functionally the same by changing you will get the following benefits:
- Original uses
ftp.us.debian.orgwhich is not the fastest for all users. The new one usesdeb.debian.orgwhich is faster for most users (CDN-backed). - The `/debian-security suffix is recommended by Debian officially to ensure consistent behavior and metadata access.
Open up the sources list:
nano /etc/apt/sources.list
And replace the contents with the following:
deb http://deb.debian.org/debian bookworm main contrib
deb http://deb.debian.org/debian bookworm-updates main contrib
deb http://security.debian.org/debian-security bookworm-security main contrib
Supress Firmware Warnings
Proxmox will show warnings about missing firmware. This is not a problem for most users. If you want to suppress the warnings, you can do so by running the following command:
echo 'APT::Get::Update::SourceListWarnings::NonFreeFirmware "false";' > /etc/apt/apt.conf.d/no-bookworm-firmware.conf
Disable Enterprise Repository
If you do not have a subscription to the enterprise repository, you can disable it. This will stop the annoying popups in the web interface. You can do this by opening up the pve-enterprise.list file:
nano /etc/apt/sources.list.d/pve-enterprise.list
And commenting out the line by adding a # at the beginning of the line. It should look like this:
# deb https://enterprise.proxmox.com/debian/pve bookworm pve-enterprise
Enable the No-subscription Repository
The no-subscription repository is a community-supported repository. It is not officially supported by Proxmox. However, it is a great way to get the latest updates and features without having to pay for a subscription. To enable it, open up the pve-no-subscription.list file:
nano /etc/apt/sources.list.d/pve-install-repo.list
And add the following line:
deb http://download.proxmox.com/debian/pve bookworm pve-no-subscription
Add/Remove Ceph Repositories
Open up the ceph.list file:
nano /etc/apt/sources.list.d/ceph.list
If you are using Ceph, you will need to add the Ceph repositories. Add the following line:
deb https://enterprise.proxmox.com/debian/ceph-quincy bookworm enterprise
deb http://download.proxmox.com/debian/ceph-quincy bookworm no-subscription
deb https://enterprise.proxmox.com/debian/ceph-reef bookworm enterprise
deb http://download.proxmox.com/debian/ceph-reef bookworm no-subscription
Otherwise, comment out the lines by adding a # at the beginning of the line. It should look like this:
# deb https://enterprise.proxmox.com/debian/ceph-quincy bookworm enterprise
Add pvetest Repository (Optional)
If you want to use the latest and greatest features, you can add the pvetest repository. This is a testing repository and is not recommended for production use. However, it is great for testing new features and getting the latest updates. To add it, open up the pvetest.list file:
nano /etc/apt/sources.list.d/pvetest-for-beta.list
Then add the following line:
deb http://download.proxmox.com/debian/pve bookworm pvetest
Update apt
Now that you have added the repositories, you can update apt. Run the following command:
apt update
This will update the package list and ensure that you have the latest packages available. Without doing this, you will not be able to reinstall the Proxmox widget toolkit in the next step.
Disable Subscription Nag
Proxmox is awesome. The Nag is not. BUT, if you like Proxmox, consider supporting them by purchasing a subscription. This will help them continue to develop and support Proxmox. You can purchase a subscription here.
Create a new config file:
nano /etc/apt/apt.conf.d/no-nag-script
Paste in the following:
DPkg::Post-Invoke {
  "dpkg -V proxmox-widget-toolkit | grep -q '/proxmoxlib\\.js$'; if [ $? -eq 1 ]; then { echo 'Removing subscription nag from UI...'; sed -i '/.*data\\.status.*{/{s/\\!//;s/active/NoMoreNagging/}' /usr/share/javascript/proxmox-widget-toolkit/proxmoxlib.js; }; fi";
};
Reinstall the Proxmox widget toolkit:
apt --reinstall install proxmox-widget-toolkit
You may need to clear your browser cache to see the changes in Firefox you can do this with Ctrl + Shift + R or Ctrl + F5. In Chrome you can do this with Ctrl + Shift + R or Shift + F5. In Edge you can do this with Ctrl + Shift + R or Ctrl + F5. In Safari you can do this with Cmd + Option + E to clear the cache and then Cmd + R to refresh the page.
Enable (Optional)
If you are using a cluster, you may want to enable or disable high availability.
Enable High Availability (for clusters only)
systemctl enable -q --now pve-ha-lrm
systemctl enable -q --now pve-ha-crm
systemctl enable -q --now corosync
Disable High Availability (for single node only)
systemctl disable --now pve-ha-lrm
systemctl disable --now pve-ha-crm
systemctl disable --now corosync
Update the System
Now that you have added the repositories, you can update the system. Run the following command:
apt update && apt dist-upgrade -y
This will update the system and install any new packages. It may take a while to complete.
Reboot the System
Once the update is complete, you can reboot the system. Run the following command:
reboot
This will reboot the system and apply any changes. That's it! You have successfully completed the post-installation tasks for Proxmox. You can now start using Proxmox and create your virtual machines.