Jellyfin with HA
Overview
Jellyfin is a free and open-source media server software that allows you to organize, manage, and stream your media collection. This guide will walk you through the process of setting up Jellyfin with Hardware Acceleration (HA) on Proxmox.
In order to enable HA, you will need to ensure that your GPU Passthrough has been set up correctly. I will be install Jellyfin on a VM with Debian 12, using only the CLI.
Create Jellyfin VM
General
Name the VM, I usually name it jellyfin.
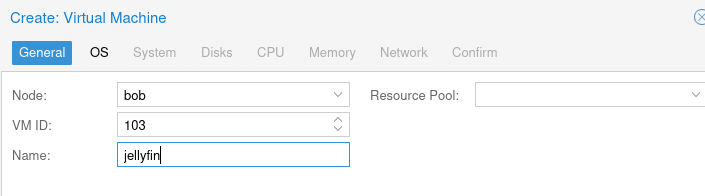
OS
Select Linux and Debian 12 (64-bit).
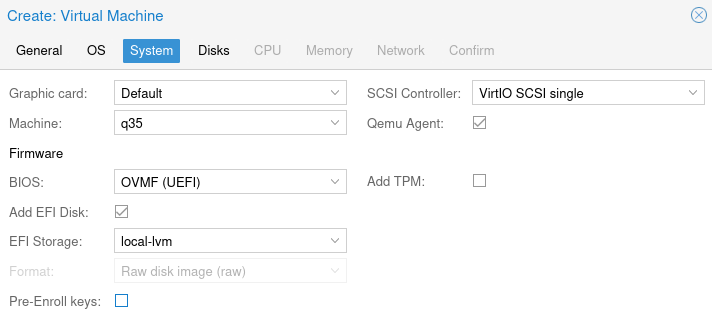
System
Machine: q35
BIOS: OVMF (UEFI)
EFI Disk: Yes
EFI Storage: local-lvm
SCSI Controller: VirtIO SCSI
Qemu Agent: Yes
Make sure to unselect Pre-Enroll keys
Disks
Set the disk size to be 32GB and select Discard if you are using an NVME or SSD.

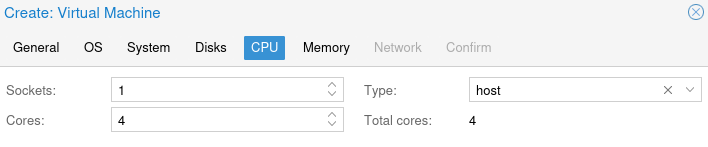
CPU
Set the CPU to Host and set the cores to 4 and sockets to 1.
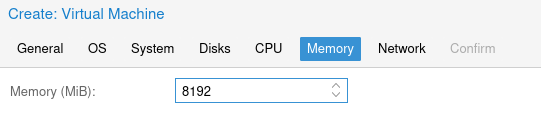
Memory
I prefer to use 8GB of RAM for Jellyfin, but you can use less or more depending on
Network
I leave everything here as defaults.

Confirm
Finally on the confirm screen just click Finish to create the VM.
Install Debian
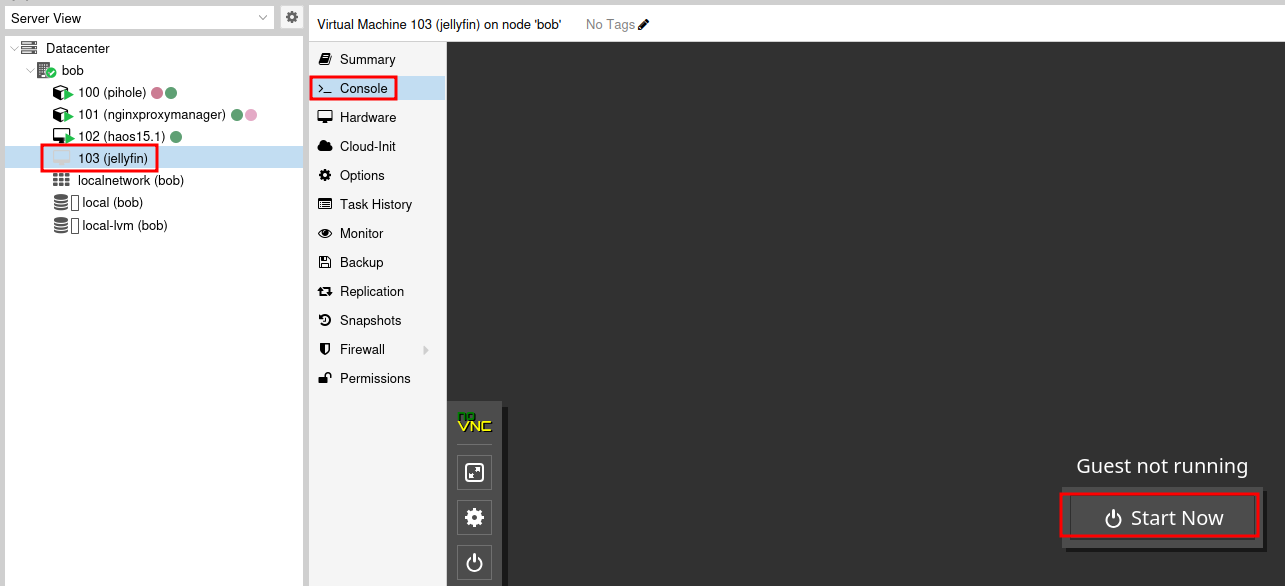
Once the VM is created, select it and then click the Console menu item to view the console. Then click Start Now.
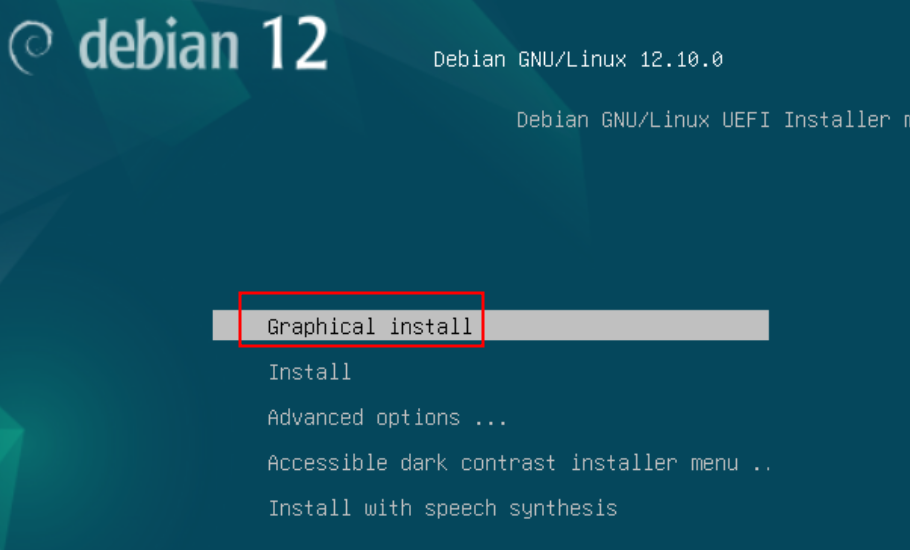
The VM will boot into the Debian installer. Select Graphical Install and press Enter.
Select your language, location, and keyboard layout. I usually select English, United States, and American English.
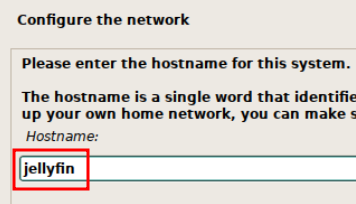
I will be using this VM for jellyfin, so I will change the hostname to jellyfin. Click Continue to proceed.
I leave Domain name blank. Then enter a secure password for the root user. I leave Full name for the new user blank and enter a username of jellyfin. Enter a secure password for the user and click Continue.
Select the appropriate Timezone. For the disk partitions, I prefer to use Guided - use entire disk and All files in one partition. This is the easiest option and works well for most users. Click Continue to proceed. Whem prompted to Write the changes to disks and configure LVM? select Yes and click Continue.
For the disk size, you can typically leave the default size, or enter max to be sure to use the entire disk. Click Continue to proceed.
When prompted to Write the changes to disks? select Yes and click Continue. The base system will now be installed.
There will be a prompt to Scan extra installation media?. Select No and click Continue.
The package manager will be configured, select your cloest location to find a mirror. I will select United States and deb.debian.org. Click Continue to proceed. Enter a proxy if you have one, otherwise leave it blank and click Continue.
Decide if you want to participate in Popularity-Contest. I usually select No and click Continue.
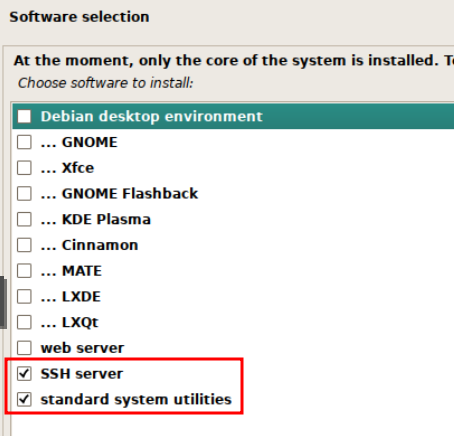
In this guide, I will be unselecting all GUIs and only installing the SSH server and standard system utilities. This is because I will be using the CLI to install Jellyfin. If you want to use a GUI, you can select one of the options here. Click Continue to proceed.
Press Continue to reboot when the installation is complete.
Update and Install Depenencies
Once the VM has rebooted, log in with the root user. Then run the following commands to update the system and install the dependencies:
apt update && apt upgrade -y
and
apt install -y sudo curl cifs-utils
Now add the user jellyfin to the sudo group:
usermod -aG sudo jellyfin
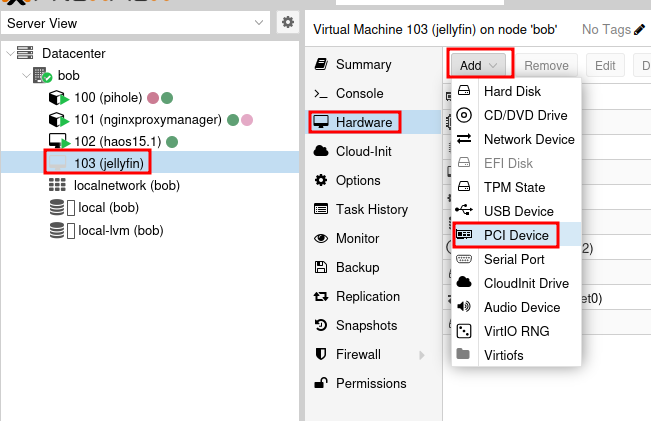
At this point I prefer to shutdown the VM and attach the GPU. You can do this by selecting the VM and then clicking on the Hardware tab. Then click on Add and select PCI Device.
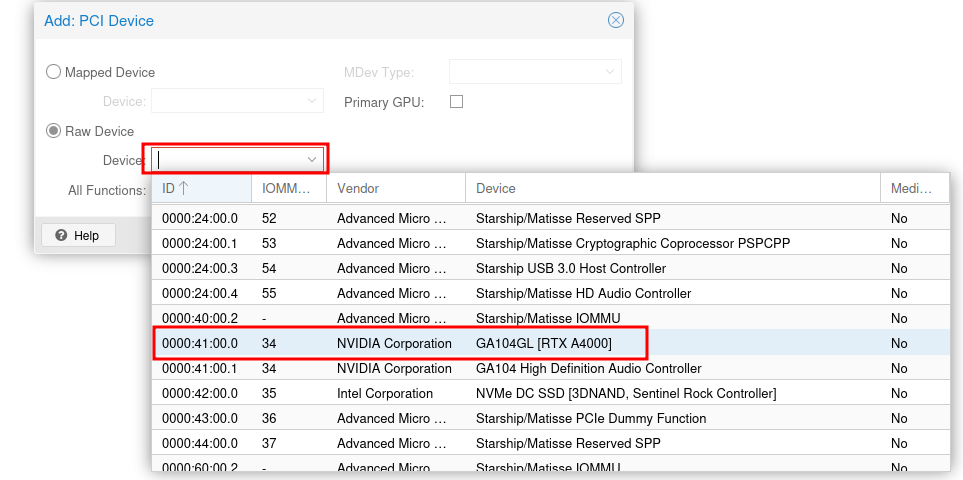
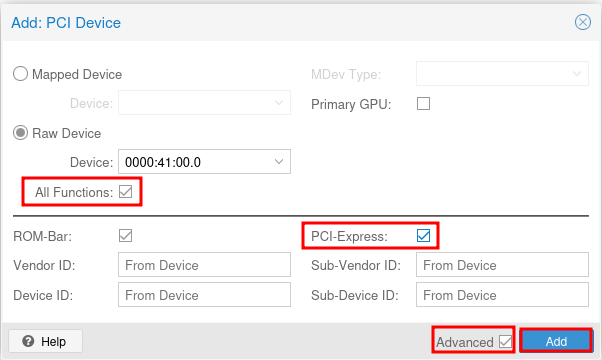
Select your GPU from the list and click Add. Make sure to check the box for All Functions to passthrough all functions of the GPU.
lick Advanced and select PCI Express.
If you would like the GPU audio, you can also select the audio device as a separate PCI device. Once finished, start the VM. I prefer to use an SSH client called Termius to connect to the VM. You can also use the built in SSH client in Windows or MacOS. If you are using Windows, you can also use Putty. The built-in console can get a bit tedius.
Verify GPU Passthrough
Once the VM is started, SSH into the VM and run the following command to verify that the GPU is passed through correctly:
lspci | grep -i nvidia

Install NVIDIA Drivers
Now that the GPU is passed through, we need to install the NVIDIA drivers. First, update the sources to include non-free and contrib packages.
Edit the sources list:
nano /etc/apt/sources.list
Then add contrib non-free to the end of the lines that start with deb. It should look like this:
deb http://deb.debian.org/debian bookworm main contrib non-free non-free-firmware
deb http://security.debian.org/ bookworm-security main contrib non-free non-free-firmware
deb http://deb.debian.org/debian bookworm-updates main contrib non-free non-free-firmware
Then save and exit the file by pressing CTRL + X, then Y, and then Enter.
sudo apt update
sudo apt install -y nvidia-driver nvidia-smi nvidia-cuda-toolkit
Reboot the VM
sudo reboot now
Once the VM has rebooted, run the following command to verify that the NVIDIA drivers are installed correctly:
nvidia-smi